
For this tutorial, we shall utilise Pidgin: https://pidgin.im/ and this Jabber Server: https://jabber.hot-chilli.net/
To facilitate secure communication over XMPP, one may install the OTR plugin. OTR (Off-the-Record) provides end-to-end encryption and has achieved a rating of 7/7 on the Electronic Frontier Foundation’s secure messaging scorecard: https://otr.cypherpunks.ca/
1. Install Pidgin and the OTR Plugin
– For Windows:
Download Pidgin here: http://pidgin.im/download/
Subsequently, download and install the OTR plugin for Pidgin from here: https://otr.cypherpunks.ca/index.php#downloads
– For Mac:
Install Adium: https://adium.im/ and adhere to this guide: https://adium.im/help/pgs/AdvancedFeatu … ption.html
– Should you be using Linux (strongly advocated in Whonix):
Install the packages known as ‘pidgin’ and ‘pidgin-otr’.
For Debian
Code: Select all
sudo apt install pidgin pidgin-otr
For Fedora
Code: Select all
sudo dnf install pidgin pidgin-otr
For Arch Linux
Code: Select all
sudo pacman -S pidgin pidgin-otr
2. Establishing an Account:
To begin, you must establish an XMPP account. For the purposes of this guide, we shall create one on a website.
– Open the TOR Browser and navigate to the following link: https://jabber.hot-chilli.net/
– Subsequently, click on “Account” and “Create Account”:
– Upon viewing the account creation page, select your desired username, Jabber domain, and ensure your chosen password consists of a minimum of 35 characters: https://passwordsgenerator.net/. It is imperative to update this password on a bi-weekly or monthly basis:
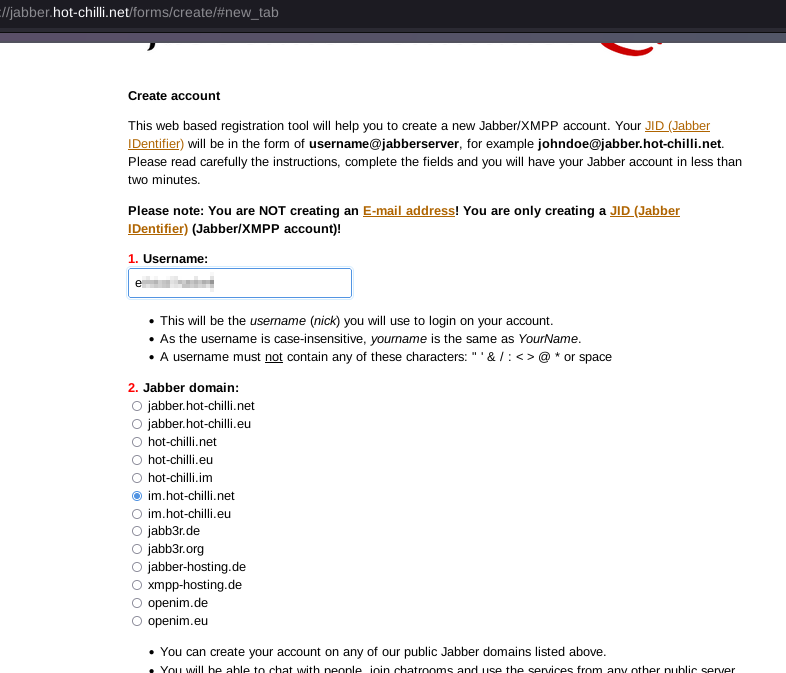
– Complete the Captcha challenge and click on “Create Account”. If all information is accurately provided, you shall be presented with a confirmation prompt indicating the successful establishment of your account.
– Now, open Pidgin. Should the Accounts window be visible, select ‘Add’. If it is not, proceed by navigating to Accounts > Manage Accounts, or alternatively, press the key combination Ctrl+A.
– Subsequently, from the Protocol dropdown menu, select ‘XMPP’.
– Provide your username and corresponding password.
– For the ‘Domain’ field, insert the details of the XMPP server.
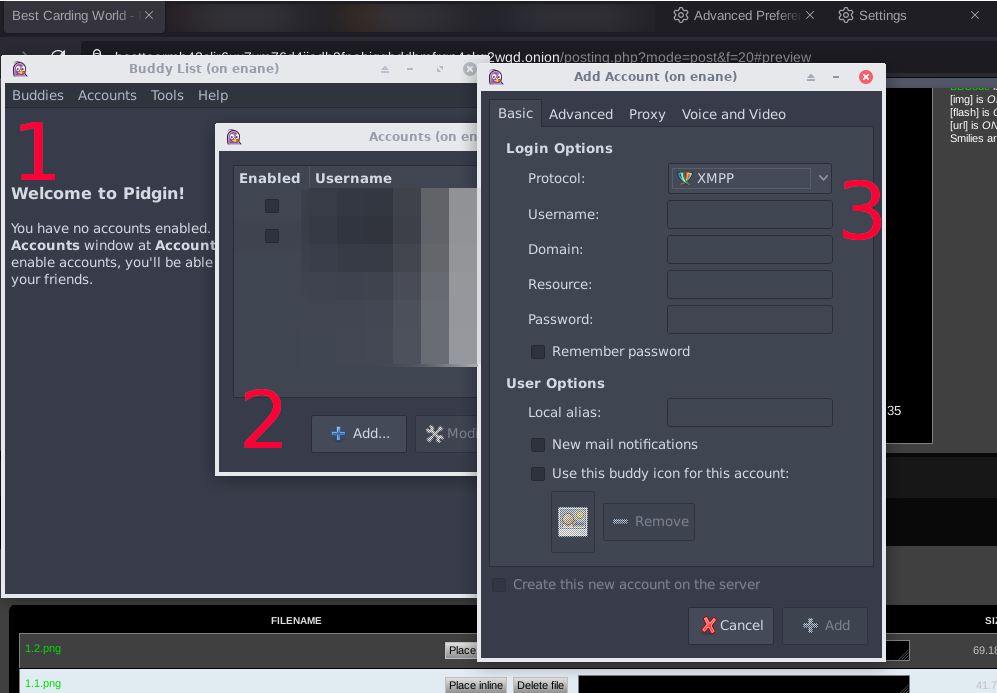
Prior to clicking on “Add”, navigate to the ‘Advanced’ tab. In this section, you have the option to input a .onion address for the connect server.
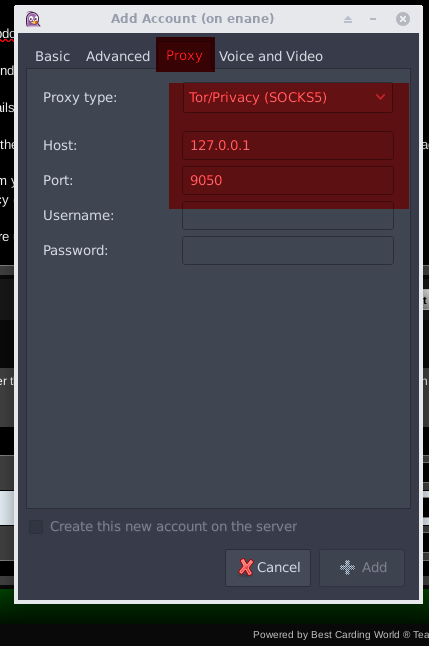
– Lastly, to ensure all traffic to and from your account is routed via Tor, proceed to the ‘Proxy’ tab.
For the ‘Proxy type’, select ‘Tor/Privacy (SOCKS5)’.
Input ‘127.0.0.1’ for the ‘Host’ field.
Enter ‘9050’ for the ‘Port’ field if you are using the Tor service, and ‘9150’ if you are using the Tor Browser:
Click add.
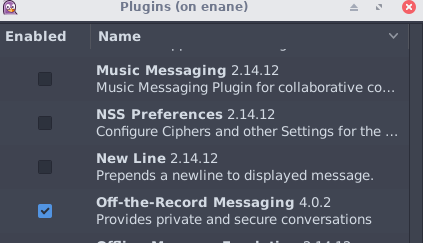
– To activate the OTR plugin, navigate to Tools > Plugins and place a tick in the box adjacent to Off-the-Record Messaging.
To commence an OTR dialogue, click OTR at the top and select “Start private conversation”.
Recall: Always authenticate your acquaintance outside of an XMPP conversation. Either confirm the fingerprint in another manner or utilise an existing shared secret/question with answer exclusively known by yourself and your buddy.
Note: The “otr.fingerprints” and “otr.private_key” files are located in: ~/.purple/.